Storybook & Atomic Design - 1.3. - Building Our Stories
Hey! This post's a little over two years old now, so some of what's here might be out of date. Still worth a read, but if anything really matters to you, it's worth double-checking against a newer source too.
GitHub - whatjackhasmade/storybook-atomic-design-react
Contribute to whatjackhasmade/storybook-atomic-design-react development by creating an account on GitHub.
If you've followed our setup lesson, you should now have a local Storybook development available on your local machine. In this lesson be covering how we can go about writing and building our own custom stories.
But before that, let's first define what a story is in Storybook.
What is a Story?
Technically, a story is a function that returns something that can be rendered to screen. - https://storybook.js.org/docs/basics/writing-stories/
In the context of Storybook, a story is a visual representation of a component or interface within your design system.
This could include something basic such as a list item or something large like a footer component.
In its most basic form, we would simply return the component to the render of the story. However, we may extend the base functionality of a story to include advanced configuration with the inclusion of data imports and documentation around a component to help aid the telling of the story.
Pre-Config
Our current Storybook structure looks something like this -
I'm not a big fan of this structure though as it implies that stories exist in one directory, with components in another. I'm all for having a dedicated directory for complex stories but when developing a component, it'd be really helpful to have the story coupled to the component.
So this structure won't work, instead, I want to create a new directory which will house atoms, molecules, etc. with each component directory having a React component and story file.
To achieve the new structure, we'll need to modify the
config'directory to search our new components directory instead of looking inHow Do We Write a Story?
To add our first story we'll do the following -
- Start our development environment
- Create our button component directory
- Create our React button component
- Create our Storybook story file
Start Storybook
So before we start writing any files or components, let's first get Storybook up and running locally.
We can do this by running the following command in the root directory of our Storybook project.
You should now have a React Storybook instance development server available at
Recommended Directory Structure
With our Storybook environment spun up on our local machine, we'll now create our button component directory. Storybook recommends keeping your story file nested in the same directory as the React component file it is associated with to keep the documentation coupled with the component.
I agree that the directory structure makes sense, as I tend to keep all style files as siblings within the associated parent component directory, so it would make sense to also keep the documentation in the same directory too.
Create our React Button Component - button.jsx
JSX is a popular templating language associated with React. It's similar to a standard JavaScript file but allows for template highlighting and structures that make sense in the context of React.
For our first story, we'll create a Functional Component in React which will take in props and return a very basic button with the default button browser styles and functionality.
In our component, we are immediately destructuring the props the component is passed and getting access to the `children'prop value. For anyone unfamiliar, the value of this props is equal to the values found between the components opening and closing tags when we call it later on.
For example, if we used
hello`.Creating our Story File - button.stories.js
With our component available, we now need to add it to our Storybook environment.
This is done with the use of a file with a `.stories.js'file extension.
The syntax of this file is very similar to our `button.jsx'file. We first import React to make it available to our file and then import our React Button component so that we can use it to write examples on how the Button may be used in a React application.
Next, we create a basicButton function which returns our Button component with the `children'prop value of 'Basic Button'. This would then render a default HTML button with Basic Button as the text value.
Finally, we are exporting a default object from our file with two properties.
The first property is the Component we are documenting, so in this example, we would reference the Button component.
The second property is the title of the story, for which we will simply title it 'Button'.
What you should now notice is when you visit - https://localhost:6006/?path=/story/button--basic-button in your browser, is that we now have access to a story titled 'Button' with our story example returning an un-styled, default HTML button element with the text 'Basic Button' within it.
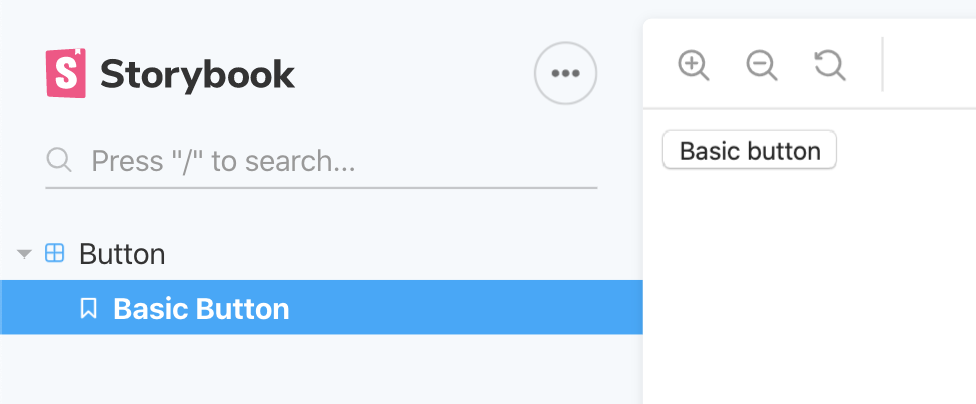
And there you have it, you've written your first story for your storybook.
We'll be revisiting the button component throughout the next few lessons to extend it with custom functions, styles and icons but for now, I wanted you to get familiar with the process of adding a story to your storybook.
If you still feel a bit confused or wanted to learn more about adding stories, you can do so at Storybooks official documentation - https://storybook.js.org/docs/basics/writing-stories/